Roller-dance tutorial: « Two-Step » (Dolly’s 9 to 5)
Second rollerdance session in isolation with Chloé Seyrès, aka Kozmic. Today, let's see a few variations of a basic step, the Two-Step. Tutorial...
Par Chloé SEYRES
Explanation step by step
Still live from my kitchen, still limited in space, still rolling!
In this 2nd apartment tutorial, let’s explore some variations on another basic step, the TWO-STEP…
(If you missed the 1st tutorial on the « SIDE STEP« , it’s over here!)
On the program, we’ll break down the move and add groove to it with some pumping. Then we’ll focus on directions and turns with squares and eights, and finally we’ll add some flourish inserting taps and rolling in the move.

1. Break it down
As the name suggests, the TWO-STEP consists in two steps : (1) OPENING and (2) GATHERING.
The first leg OPENS, and the second leg follows it to CLOSE.
Tip: Since you take a step to the side, transfer your bodyweight from one foot to the other, exactly like when you walk.
You can alternate right and left, or repeat several times the same side, up to you.
2. Groove
Now that the move is broken down, let’s add a little groove. For that, let’s focus on a recurring element: PUMPING.
- 0. In CLOSE position
- 1. When you’re about to start the move, BEND your knees
- 2. Then, when you lift your foot, STRAIGHTEN your supporting leg…
- 3. …and BEND IT BACK when the foot lands
- 4/0. Finally reset in STRAIGHTENING (most of the time halfway since you keep moving).
This creates a bouncing/shock-absorbing effect that gives fluidity to the move.
Note : See « SIDE STEP« tuto for a different explanation, if that one doesn’t talk to you.

3. Directions

We saw the TWO-STEP facing forwards, now let’s play with DIRECTIONS and make it turn.
a. Square
To start with, let’s break down a pattern called the SQUARE. The Square has 4 facets and revolves around a center point.
For each facet, make a full two-step (OPEN+GATHER) and alternate:
On each facet, change directions at (1) OPEN: pivot on the toes of the supporting leg.
REMINDER: It’s the same quarter-turn as for the Star in the previous tutorial on the « SIDE STEP« .
Obviously, start your Square by the facet of your choice, also facing the center or showing your back to it, but to keep it simple I’ll stick to that version.
b. Eight
Once you’ve assimilated the Square, you can combine it with its exact opposite to create an EIGHT. This pattern is twice as long and looks like a calculator 8!
Complete your first Square (face-back-face-back), then change center points to do a “mirror” Square (which goes: back-face-back-face).

Note: For clarity on the diagram, the FACETS 4 of the mirror-squares are on different lanes. Whereas in fact, those lanes are merged.
4. Taps
We’ve just seen direction changes, with pivots on phase 1 of the move.

a. Single Taps
Now, let’s concentrate on the 2nd phase (GATHERING) to apply a few variations to it too.
Instead of putting the 2nd foot down next to the 1st foot, let’s use the fact that the leg is free (since your weight is on the other leg) to make it TAP, in front and behind the supporting foot. With the toes or the heel…
TIP: The move will be more readable visually if you slightly cross your feet when tapping – when feet are aligned, there’s always one hiding the other.
b. multiple Taps
You can also do multiple taps! For example, try 3 taps in a row.
A few examples: front-back-front, back-front-back, front-side-back, back-back-side, etc.
NOTE: 3 is a good number, since with (1) OPEN it makes 4 BEATS, which is easy to fit into 8-COUNT ROUTINES and dance to the music.
c. Rolling Taps
This name is to highlight the fact that we are still in the TRIPLE TAP concept. But instead of lifting your foot from one spot to the other, make it roll to get there! Once you’ve tapped in front with your toes, roll your foot backwards, and then come back.
Tips
- Use your upperbody and arms to counterbalance.
- Your weight is still mainly on the 1st leg/supporting leg.
- To better render the depth and rolling of the move, place yourself slightly (or completely) sideways.

5. Drag it
For this last part, we’ll stay on the (2) GATHERING phase, and go on with the ROLLING theme.
a. Dragging of the second foot
Go back to the basic Two-Step, but instead of lifting the 2nd foot to bring it next to the 1st foot, drag/roll it to get there.
Break down the move in 3 phases:
- Open 1st foot
- Pivot 2nd foot inwards on the toes
- Roll it towards 1st foot
Once you’ve mastered the 3 phases, merge phases 1 & 2 (open foot 1 + pivot foot 2) and you’ll get a 2-beat move!
b. Dragging of the 1st foot
You can also roll the 1st foot open, rather than stepping.
Since it does the opposite of the 2nd foot (opens instead of closing), make it point OUTWARDS (instead of inwards). And for practical reasons, roll it on the heel.
Then you can combine the rolling of both feet! Or alternate…
Conclusion
Watch the video for the different demos, and the final RECAP-COMBO browsing all the variations of the tutorial.
To go further, you can check the 1st tutorial on the « SIDE STEP » over here!
Don’t hesitate if you have questions or comments on this tutorial.
And if you have special move requests for another tutorial, let me know!
Liens utiles
www.facebook.com/closeyres
www.instagram.com/closeyres
www.youtube.com/c/closeyres
and Fydelity Stereo Bagsfor the support!
#flaneurz #crewrollline #fydelity
#rollerskating #rollerdance #rollergirl
A lire également
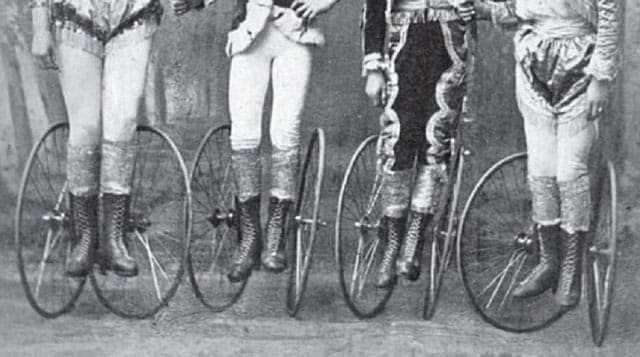
Toutes - 1883 : Les patins-cycles de enfants Elliott défraient la chronique
30 décembre 2020 - par alfathor

Sin categorizar - 10 estereotipos sobre el patinaje a los que poner fin
4 février 2016 - par alfathor
Toutes - Roller ou patin à roulettes et poussette : C’est possible !
6 septembre 2005 - par Philippe HUBIERE